Use the WPCasa All Import add-on in combination with WPCasa and WP All Import to bulk import property information from any XML or CSV file. The WPCasa All Import acts as a bridge plugin and makes sure that the WP All Import plugin displays all the WPCasa custom fields in plain English and imports image galleries in the correct format.

The WP All Import plugin is extremely helpful to give us an intuitive interface to map the elements (here listings) of any XML or CSV file to the data structure we need. The most important step when you use the importer is the import template that you can set up with drag and drop.
The WPCasa All Import add-on makes it easier for you to find the custom fields and image galleries that are used for the property information.
Install WP All Import
This add-on a bridge plugin because it does not work without the core plugin. Therefore it is necessary to make sure that you first install the corresponding plugin. The free version WP All Import is available on WordPress.org.
Our add-on and the following example will work with the free version. But you might also want to check their website for the PRO version that comes with a set of even more powerful features (scheduled imports from URLs and more).
Install WPCasa All Import
Now if you have installed the WP All Import core plugin we can install our WPCasa All Import add-on. Please go to WP-Admin > Plugins > Add New and type “WPCasa All Import” in the search field. Click Install Now once you’ve found the plugin and activate it.
Example File
The following tutorial uses an example CSV file. For the sake of simplicity of this tutorial it only includes 4 entries with a very simple data structure. Your import file might be different. But the import procedure is easy to apply to any other well-formatted CSV or XML file.
Create New Import
Now we are ready to acutally import our first listings. So let’s go and create a new import by clicking on WP-Admin > All Import > New Import.
Upload a File
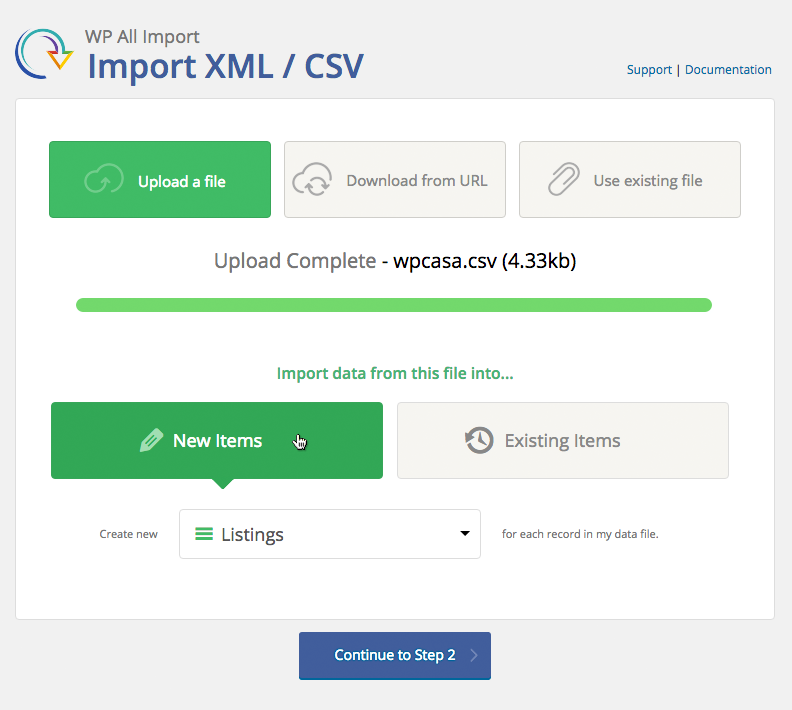
In our example we will choose Upload a file on the next screen and browse to the example CSV file on our local computer. Further we have to define what kind of content (post type) we are going to import. We’ll select Listings here.
Select a Node
When we proceed to step 2 we will see how WP All Import interprets our importer file by showing us a node (the listing element) and a visual overview of the data of each node. Most of the times WP All Import automatically detects everything correctly and you won’t have to change anything during this step. But of course this also depends on your file.
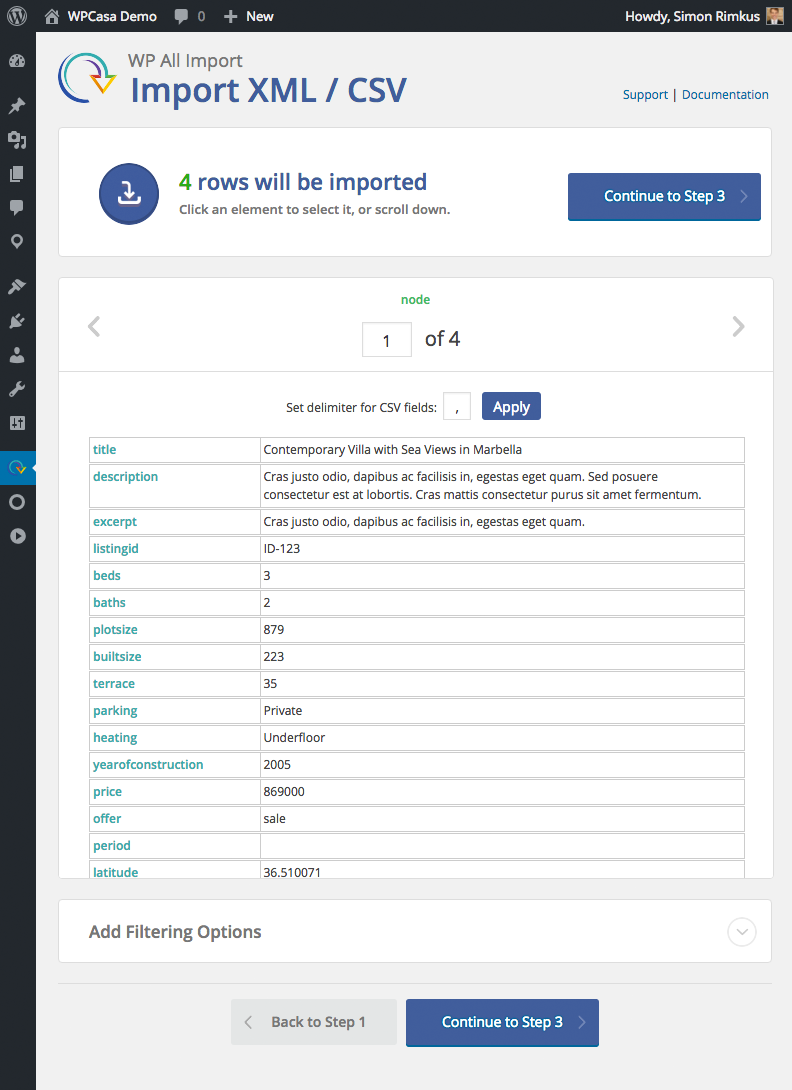
Another option is to apply filters by adding custom rules. For the ease of this tutorial we will not go into too much detail here. So let’s go on to step 3.
Create Import Template
In this step we will be creating the import template and map the importer file fields to the data structure of our WPCasa listings. By simply dragging and dropping the field elements (e.g. title, listing ID) on the left to the corresponding fields of WPCasa.
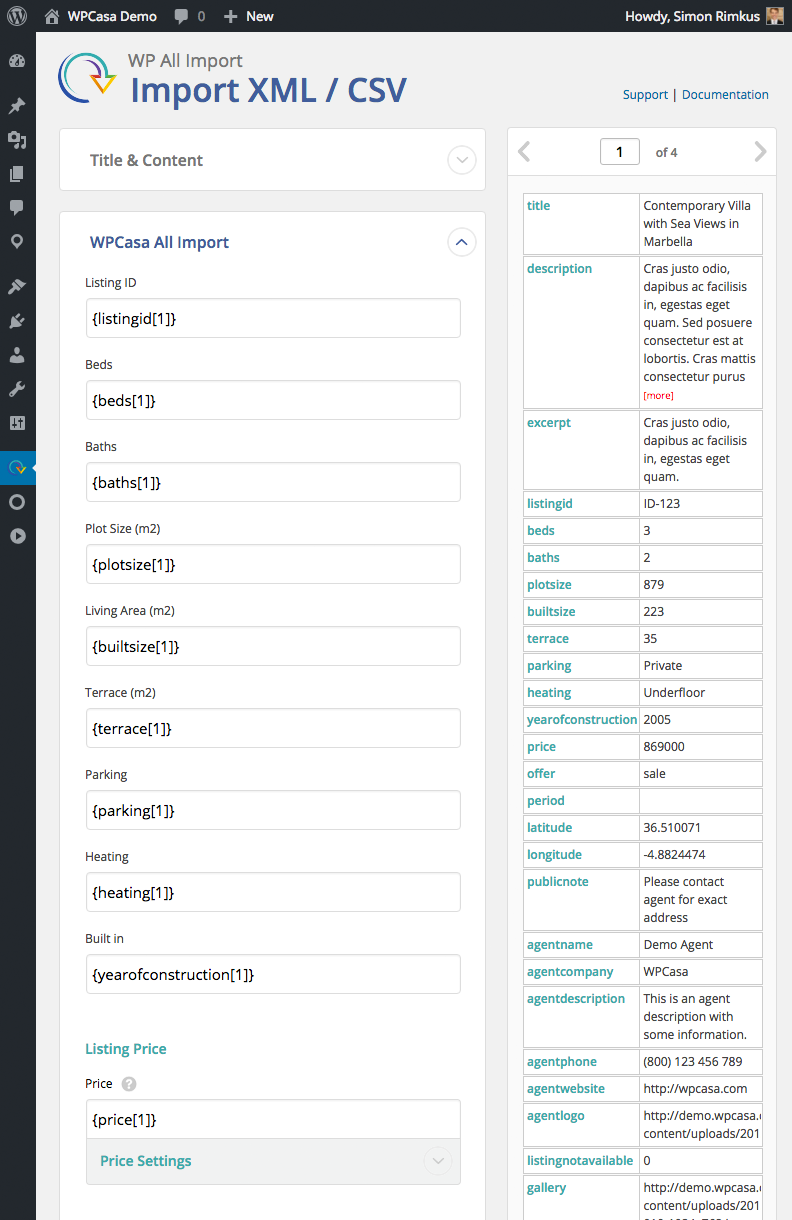
In the following paragraphs we will go through all the available fields and how we map them to match the WPCasa data structure.
Map Import Fields
In the first box of the import template you can define some general files like Title, Description and Excerpt. Ideally these fields also exist in your import file. If the listings in your file do not come with a title for example, you can think about creating a title by combining different fields (e.g. listing ID + property type + location).
Listing Details
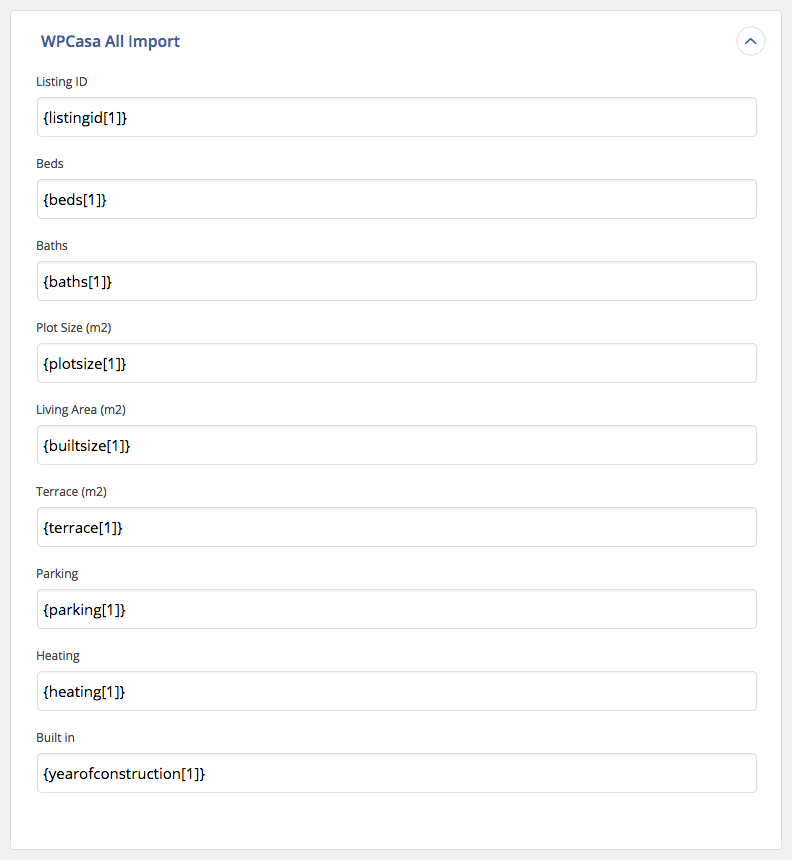
In the next section with the title WPCasa All Import we can map the WPCasa property details (beds, baths etc.) with the corresponding elements from the import file. Locate these elements in your file and drag them to the equivalent field.
Listing Price
The main listing price comes with some advanced settings in order to set the listing offer (sale, rent etc.) and optionally define a rental period. Instead of setting a static value here, you will probably have to work with the option Set with XPath to set the value dynamically according to the individual listing to be imported.
Depending on the values in your file it might also be necessary to translate the field value. In WPCasa the offer element by default allows one of two available values: sale or rent. When your import file comes with different values (e.g. forsale, forrent), you’ll have to translate them.
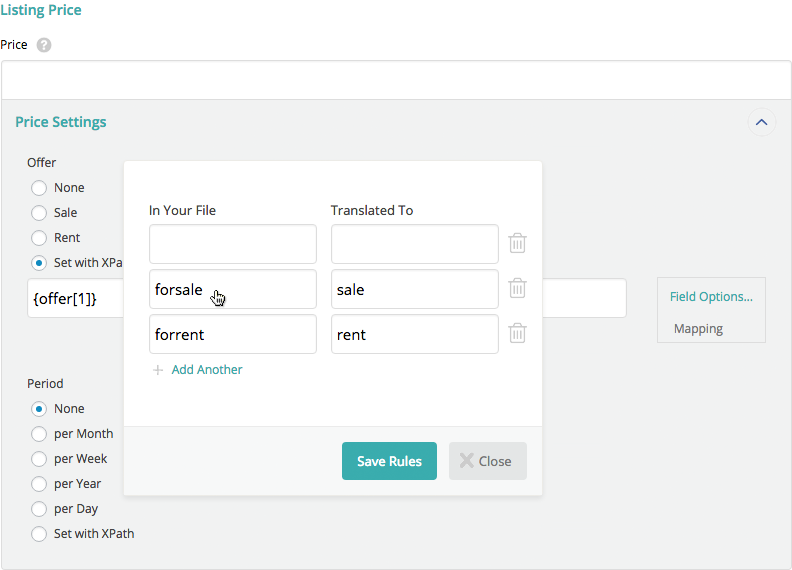
A similar procedure can be necessary when you map the different rental periods to the ones used in WPCasa. When you click on Field Options > Mapping you can see the available values in WPCasa.
Listing Location
If you use maps to display the property location, this field is important for you. To import the location of a listing we have basically two options.
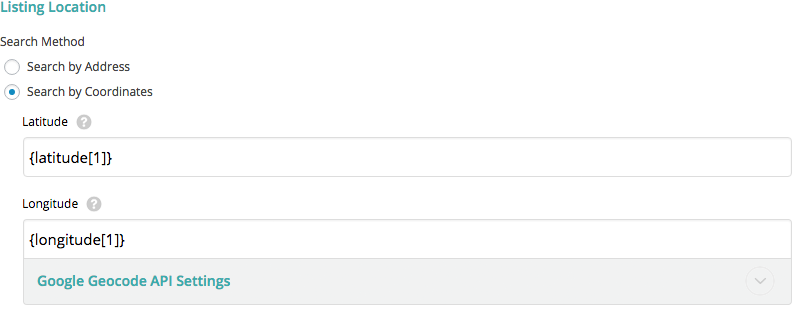
In case your import file includes the geocoordinates (latitude and longitude), you can choose the option Search by Coordinates and map the fields Latitude and Longitude with corresponding elements in your file.
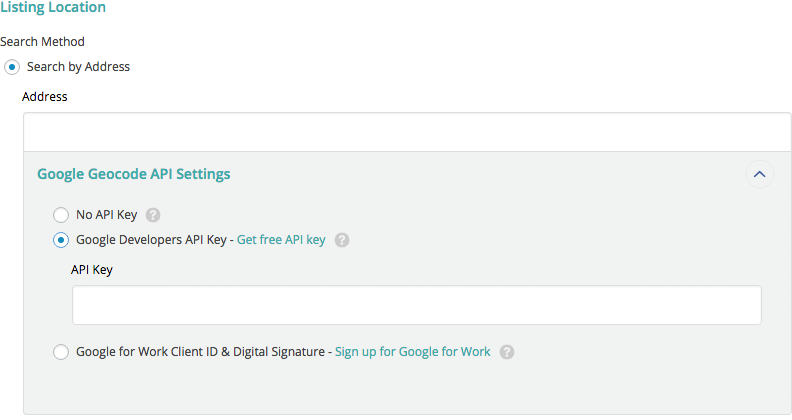
If your file does not come with the coordinates but with an address, the Search by Address is your friend. Here you can add the address field or a combined value of different fields from your file (e.g. region + town + zip code + street).
Either way, your input will be geolocalized during the import process to retrieve the necessary location data for WPCasa. Here we have to keep in mind that the Google Maps API that we use for the geolocalizing process is only free up to a certain limit.
If you reach these limits, you have the option to enter your API key and your client ID.
Listing Agent
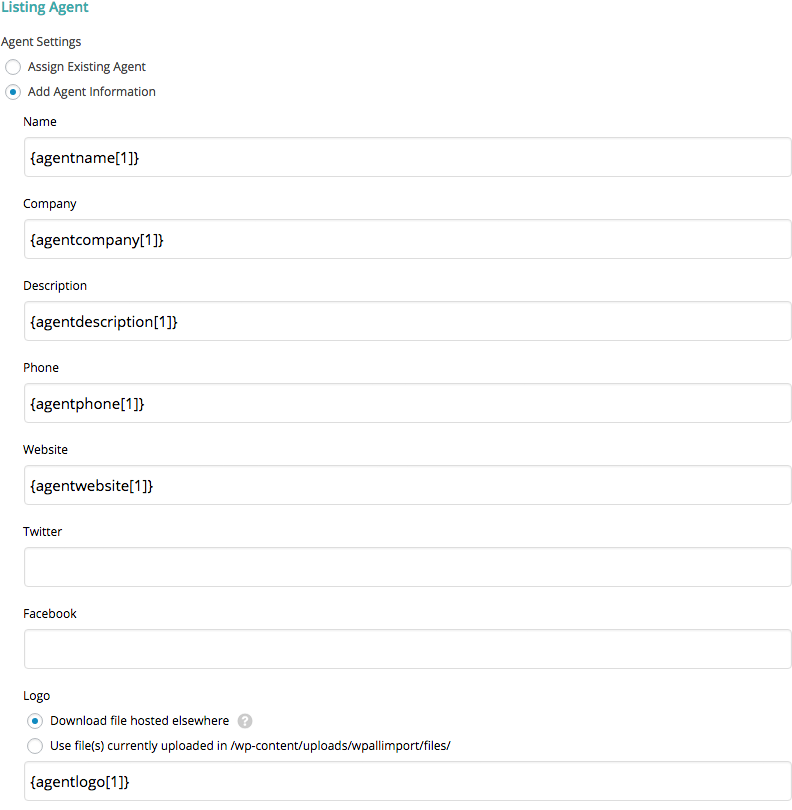
If you run your WPCasa site with multiple agents, you can also set the agent of the imported listings. We have two options to add the agent information.
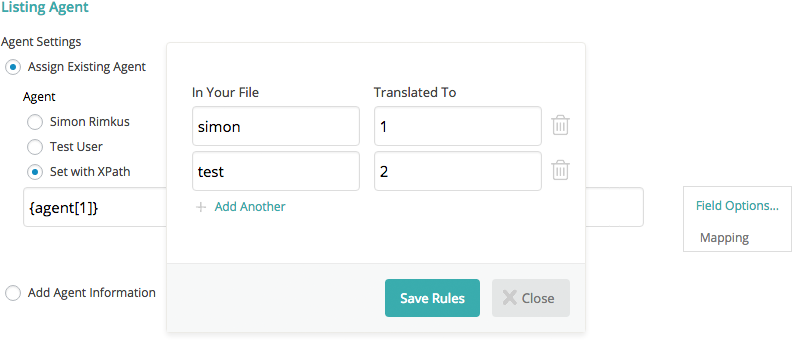
You can assign an existing agent that is already registered and exists as a user in your WordPress installation. Just select a user from the list to assign all the imported listings to a specific user or select Set with XPath to dynamically map an element from your file to the different users from your site. WPCasa expects the user ID here. So you might have to set up a Mapping to make sure the agents in your file are mapped to the existing users in your WordPress.
When your import file includes listings with individual agent information, you can select the Add Agent Information option and add the available fields.
Listing Attributes
Finally you can set the listing attributes that you might have seen on the WPCasa listing edit screen. Here you can mark a listing unavaiable e.g. when it has been sold or rented but you still want it to be displayed on the website.
Further, if you use add-ons like WPCasa Listing Labels or WPCasa Featured Listings you will see the corresponding options here.
Map Import Images
Now that we set up the hard facts of the listings we will have a look at importing images in the WPCasa Listing Images section. In this example we will import images “hosted elsewhere” by provinding the URLs of the listing images.
Our example CSV files comes with a gallery element that consists of a comma-separated list of image URLs. Therefore we will not have to list individual URLs but can simply drag and drop the gallery element to the textarea.
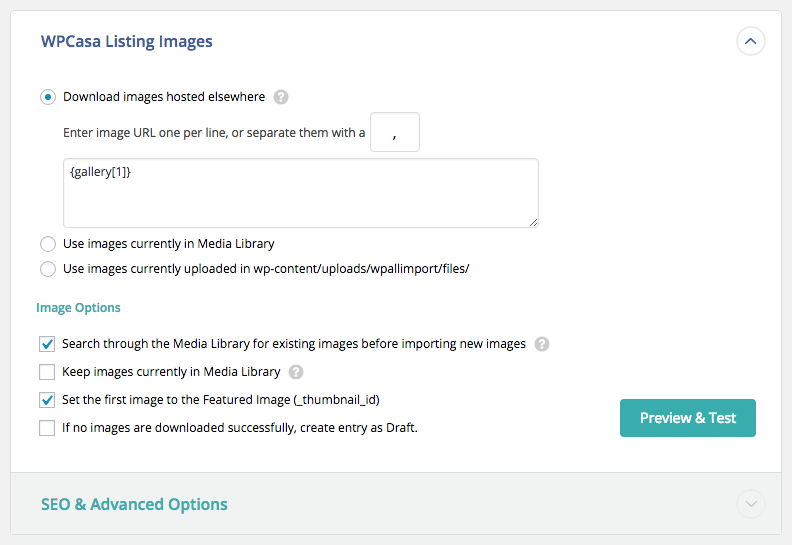
Further we will enable the option Search through the Media Library for existing images before importing new images to make sure we do not double-import images and save some memory.
We also Set the first image to the Featured Image to actually apply a featured image that is used in WPCasa. Before saving these options you can click the Preview & Test button to see if the image URLs in your file can be found and used.
If you’re a SEO expert, you might also want to check the image SEO options. For the ease of this tutorial we will skip these options.
Map Taxonomies
To categorize and organize property listings WPCasa comes with a set of custom taxonomies. To make sure that your imported listings fully integrate with your WPCasa site you should carefully set up the taxonomy mapping. Here we have to decide if a listing can have only one specific taxonomy term or if multiple terms can be assigned. When a taxonomy term does not exist, it will be created. But you may also want check if you have to enable mapping for the corresponding taxonomy.
Locations
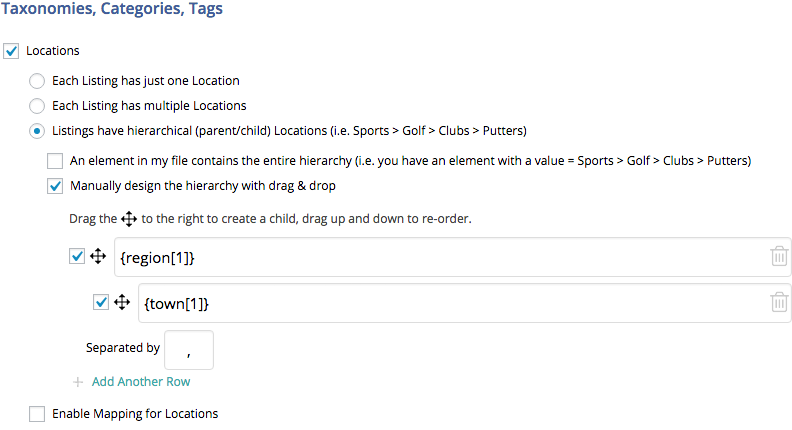
In WPCasa multiple locations can be assigned to a listing. Further the location taxonomy is hierarchical. In our example file we have a region and a town element. Apart from assigning these elements we will enable the following options:
- Listings have hierarchical (parent/child) Locations
- Manually design the hierarchy with drag & drop
Listing Types
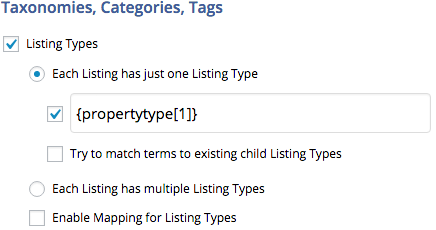
In contrast to the location terms we only have one property type per listing. For Listing Types we therefore select the option Each Listing has just one Listing Type and drag the equivalent element to the text field.
Features
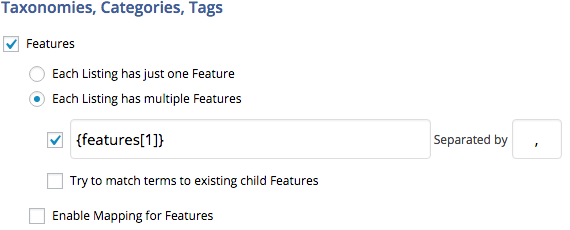
The features in our example CSV come as a comma-separated list as the value of the features element. We choose the option Each Listing has multiple Features and drag the element to the text field.
Categories
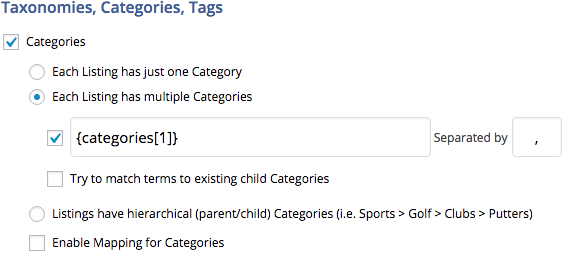
As well as the features the Categories in our example file are included in a comma-separated list in the categories element.
Run Import
All the necessary fields of our import template have been set now. WP All Import will now apply these settings to each listing of our import file and convert it with all the values translated to the WPCasa data structure.
When we proceed to step 4 we can make some final settings for the import that we are about to run. We can set a unique identifier. Usually the auto-detect options works fine.
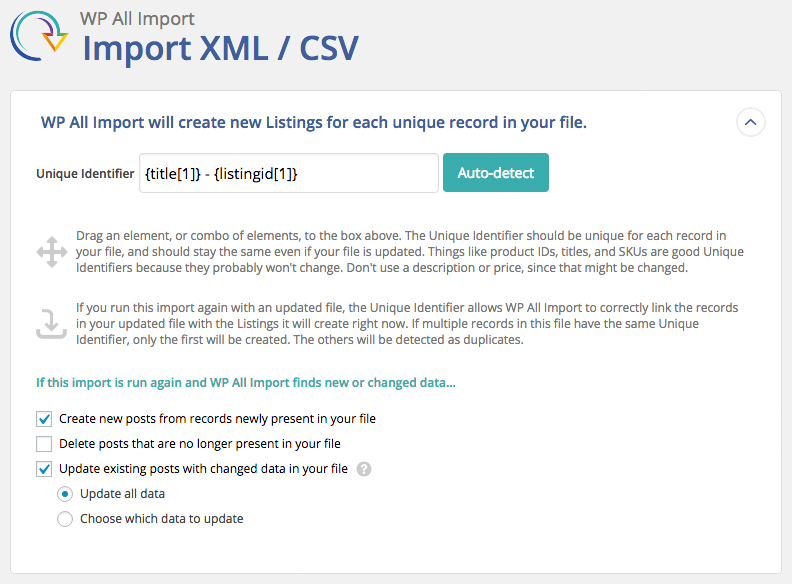
Maybe more importing are the settings related to listings that might already exist. When you go through the import process several times it is important to define what happens with data that is already there or should listings that are no longer in your import file be removed etc. These settings are especially important when we deal with recurring imports.
Import Summary
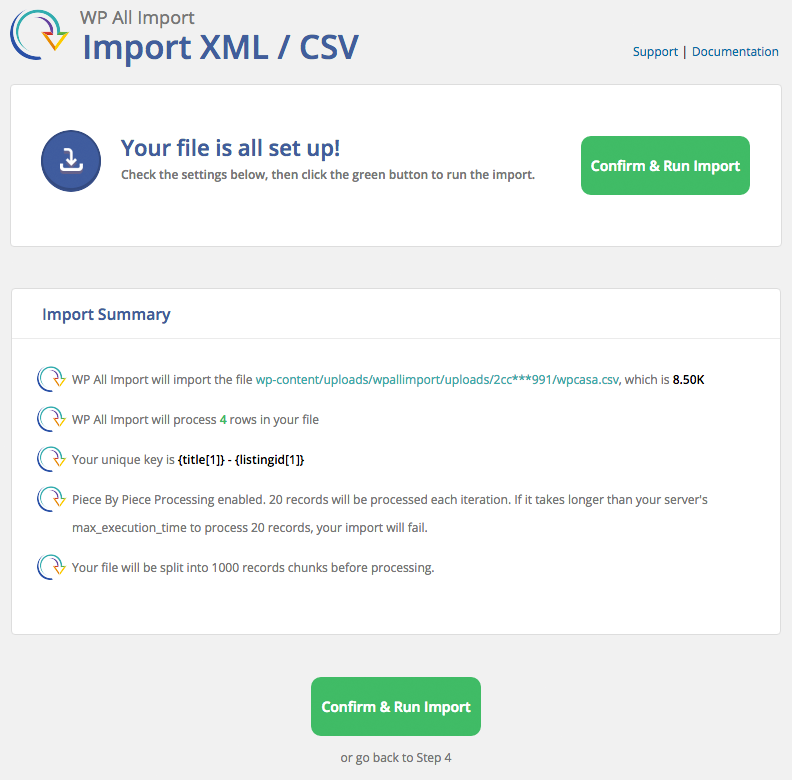
Finally we are getting close to the moment of glory. WP All Import offers us a last overview in the Import Summary. When we are okay with all the listed facts, we are ready to hit the big green Confirm & Run Import button.
Import Log
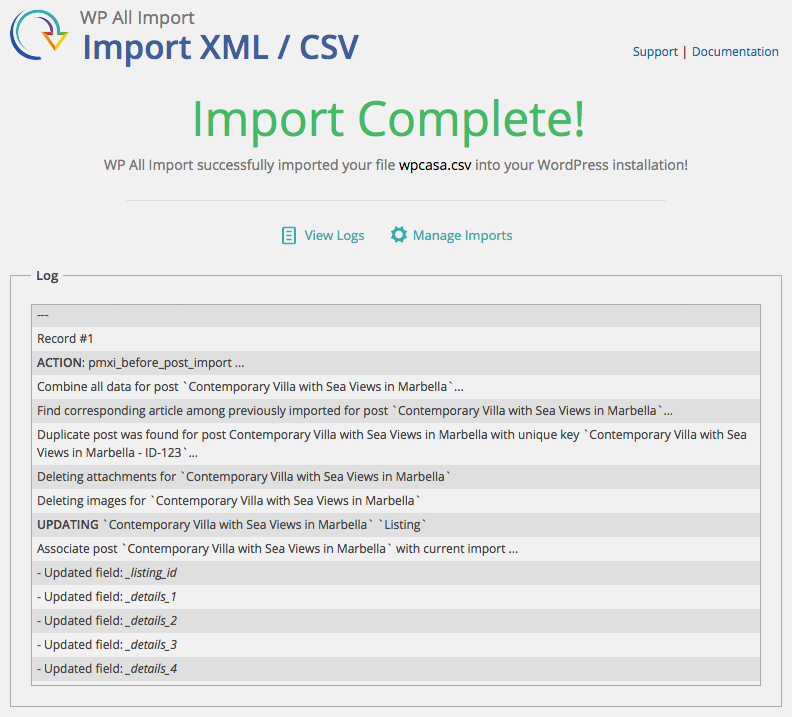
Depending on the amount of listings and images in your import file the import process can take a while. Be sure to not close the tab or window before the import is complete.
Once it has WP All Import returns an import log where we can see the result of the import of every single record of our import file. Our WPCasa All Import add-on adds log entries for all the WPCasa-relevant data.
Manage Imports
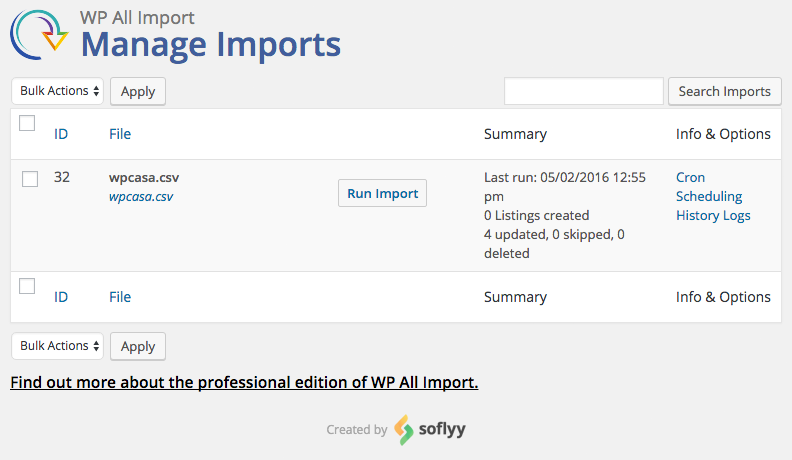
Now it’s time to check the imported listings. Was all the data imported correctly? Did mapping options work? Have no fear, you can adjust your import template any time and fine-tune if necessary. If you use the WP All Import update option, you can play around with all the settings until everything works as you expect.
You can find your imports on WP-Admin > All Import > Manage Imports. From there you can edit your import template, the import settings or just run the import again.
Useful Links
Other articles in Add-Ons
- Activate License Keys
- WPCasa Admin Map UI
- WPCasa Advanced Search
- WPCasa All Import
- WPCasa Contact Form 7
- WPCasa Currency Converter
- WPCasa Dashboard
- WPCasa Dashboard v1.0 (deprecated)
- WPCasa Energy Efficiency
- WPCasa Expire Listings
- WPCasa Favorites
- WPCasa Featured Listings
- WPCasa Gravity Forms
- WPCasa Legacy
- WPCasa List Agents
- WPCasa Listing Labels
- WPCasa Listing PDF
- WPCasa Listings Map
- WPCasa Mortgage Calculator
- WPCasa Ninja Forms
- WPCasa Polylang
- WPCasa Pricing Tables