If you would like to take WPCasa for a test drive and start with some example data without fiddling around too much, please follow this tutorial to get started with some example listings.
For those who are not sure about how to import the WPCasa example content we go through the process step by step. It’s easy, the next time you’ll take the shortcut.
WPCasa Installation
Of course you need a running WPCasa installation to be able to import the following example data. To run WPCasa in turn you’ll need an active WordPress installed on your server. If you have those too in place, you can kick off.
Download example.xml
In this tutorial we will be using the import function that comes with WordPress. The dummy content is provided in XML format. Please download the following file to your local computer.
Import example.xml
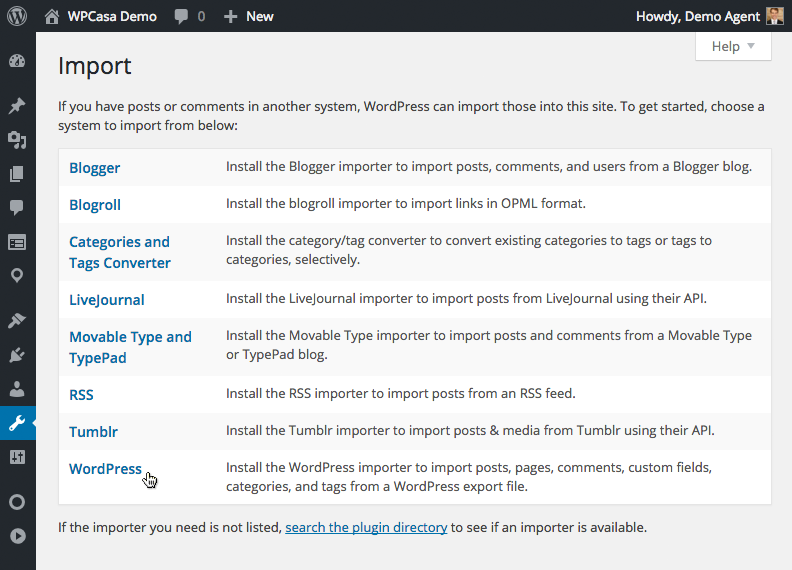
To import the example file that we downloaded in the previous paragraph we need to go to WP-Admin > Tools > Import.

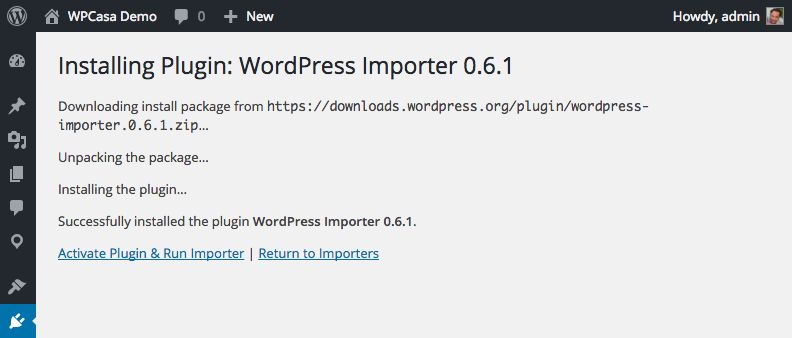
Then click on the last option WordPress. If you have not used the WordPress importer before in this installation, you’ll need to download it from the plugin repository. No worries, the screen instructions will guide you through the process.

Once finished, activate the importer and browse to the example file on your computer when you see the Import WordPress screen. Then click the button Upload file and import.
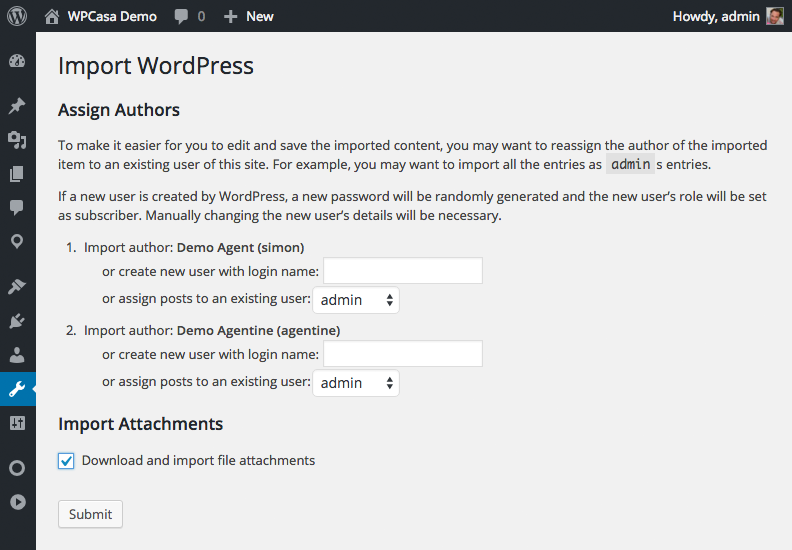
On the next screen you can assign the post authors. The example files comes with two demo agents/users. You can assign them to your admin account or create new ones. The more important option is maybe to also import the file attachments to make sure your example listings have featured images.

Ready to Go!

When the import is finished, you’re ready to use WPCasa. You may also want to have a look at Setting up WPCasa for more info about the plugin settings.
Finally browse to the front end. Interesting might be the static page Listings that was automatically created when you first activated WPCasa.