Packages in our WPCasa Dashboard add-on are important if you use the payment option. If you would like to charge your users for displaying their listings on your website, you can create as many different packages as you need.

A package basically is a pricing plan with a set of conditions, permissions and a price. In this tutorial we will go through all the options to see how we can set up a package.
Activate Packages
First we have to activate the payment option Packages as it is deactivated by default. This setting makes sure that a payment has to be cleared before a certain listing goes live or the user can even access the listing submission page. Also see Setting up WPCasa Dashboard.
Create a Package
You can find the package management on WP-Admin > Packages. When you have not set up any package yet, click Add New to create your first one. Once a package is published users can select it through the options in the dashboard.
Package Settings
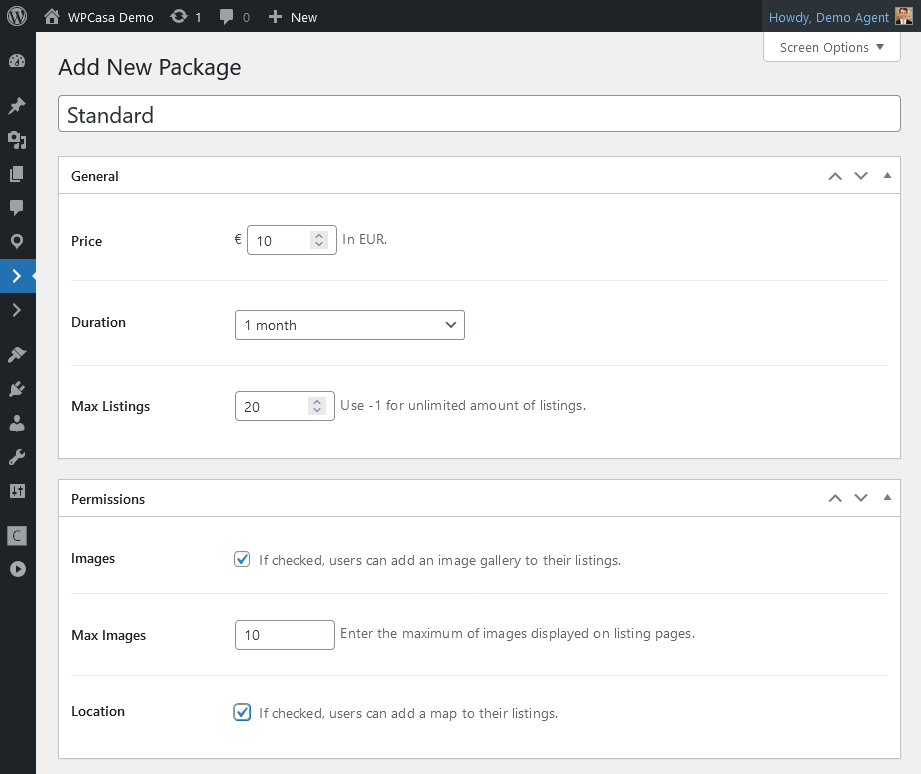
On the package edit screen we can make our settings depending on our pricing structure.
| Setting | Description |
|---|---|
| Title | The title will be used to identify the corresponding package in your back end as well as on the front end and will be visible for your users when they select a package. If you use the pricing tables add-on, it will also be used there. |
| Price | Of course the price is the centerpiece of the package. Here you can set how much the user has to pay to sign up for this package. For trial periods etc. the price can be 0 (zero). The currency is set on the general WPCasa settings page. |
| Duration | With the duration option you can fix a time limit. If a user does not renew his package during that time, his listings will be unpublished. |
| Max Listings | Further it is possible to set a number of maximum listings. Only if a user has less listings than allowed, he will be able to submit a new listing. With a value of -1 you can deactivate any limit. |
| Private | This option will only be visible when you also use the WPCasa Pricing Tables add-on. A package can be set to private to not appear in the package options of a pricing plan in the pricing table. |
Package Permissions
Another strong point of the packages are the permissions. Depending on the type of package you can set different permissions.
| Permission | Description |
|---|---|
| Images | If you use a WPCasa theme than includes an image gallery, you can allow or disallow the upload of images through the dashboard. |
| Max Images | Further you can limit the number of images that is displayed on a listing page. |
| Location | If you activate this option, the user will be able to set a location for the listing that will be displayed on a Google Map on the listing page. |
Other options might be activated through add-ons.
Pricing Options
The above settings allow you to set up a great variety of pricing options. Let’s just think of some examples.
| Example Plan | Description |
|---|---|
| Trial | You can set up a free trial period by introducing a 0 in the price field, set a duration (e.g. 1 week or month) and a limit of listings the user can submit. After this period the user will have to switch to a paid plan or his listings will be unpublished. |
| Per Listing | Another option is to set up a payment per listing. Set a specific price, ignore the duration and set the Max Listings option to 1. Of course you can also create any other package here (1, 3, 5 or 10 listings etc.). |
| Subscription | A subscription type of plan can be created by setting the duration. As long as a user with this plan has an active subscription, his listings will be displayed. If you like you can set a maximum number of listings too. |
As you can see the possibilities are pretty much endless as you can combine the different settings and play with the permissions. Think about a good pricing plan and market it (e.g. using our Pricing Tables add-on).
User Package
A user can select and purchase a package on the Package page. If you created the dashboard pages automatically (also see Creating Dashboard Pages), please find it on WP-Admin > Pages. Place a link on your website to make sure registered users can find this opton.
Optionally you can also place the [wpsight_dashboard_package] shortcode on the profile page to let users select a package when they edit their profile.

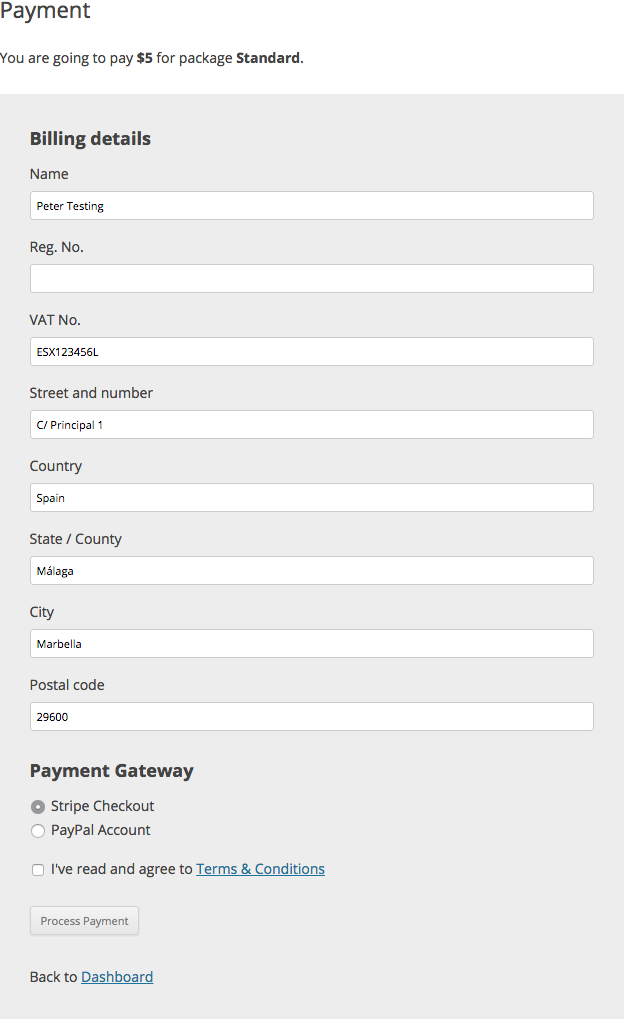
When a user decides to purchase a package, he can select the one that fits his needs and proceed to the payment page (Payment Page has to be set in dashboard settings) to enter his billing details and select the preferred payment gateway.
Once a user has finalized a payment and is assigned to one of the available package you (as a WordPress administrator) can see or edit it on the admin profile page of the corresponding user.
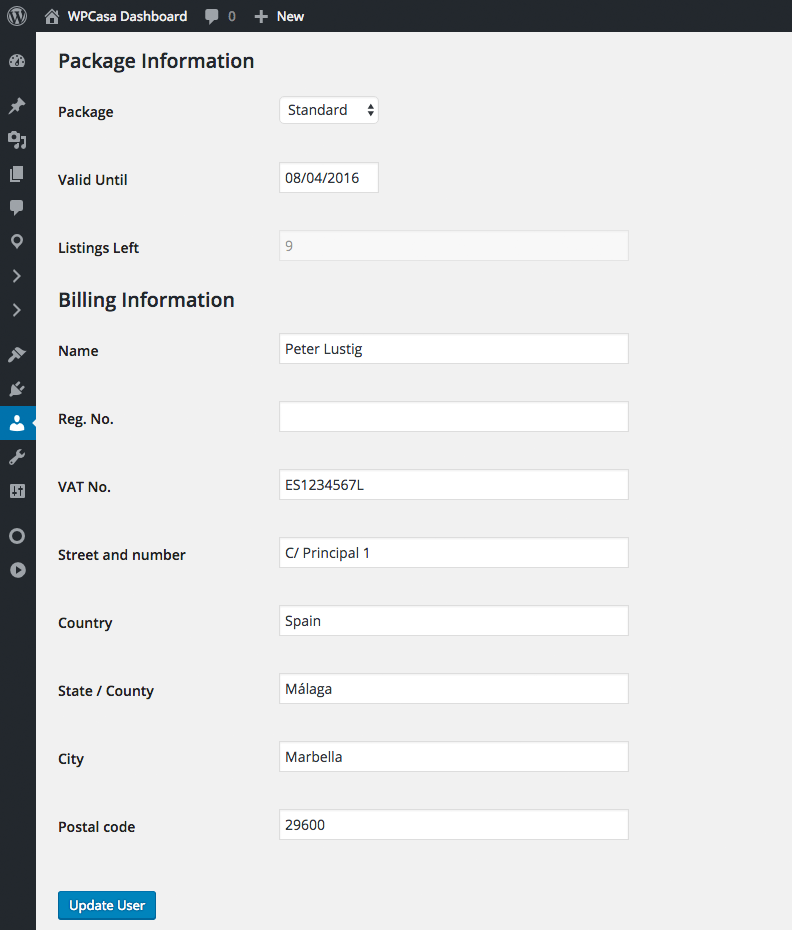
You will find the information about the user package, when it expires and how many listings the specific user is allowed to add more. Further you have access to the billing details that the user entered when he processed his last payment.