Organizing your contact leads in the long term can be a powerful tool to take your real estate agency to the next level. Managing old contacts and finding potential new buyers is essential to grow your business. In this article we will go through the process of connecting WPCasa to the CRM solution Agile CRM.

Technically we will sent contact leads (here messages sent through the contact form) to the Agile CRM, create a new contact and a task to be able to manage the client through the CRM system. Also have a look at the Agile CRM website to see what you can do with their powerful system. Especially for real estate businesses there are effective tools to improve marketing.
Requirements
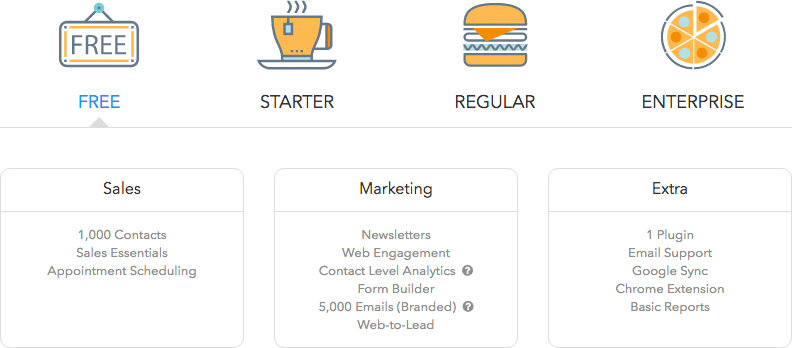
Before we can start we need to install a few tools (not all free of charge) in order to send our leads to Agile CRM. The first thing we need to do is creating an account on the Agile CRM website. They have a free plan for 2 users.
Next we need to install a few plugins in our WordPress installation.
| Plugin | Description | Link |
|---|---|---|
| WPCasa | This should be clear. Of course we need the WPCasa core plugin. | WordPress Repository |
| Gravity Forms | To create the contact form we will use the Gravity Forms form builder plugin. | Gravity Forms website |
| WPCasa Gravity Forms | To improve compatibility with WPCasa we will also install our free add-on. | WordPress Repository |
| Gravity Forms Agile CRM | This add-on allows you to integrate any Gravity Form with Agile CRM, to create or update contacts and create tasks. | Gravity Forms website |
This might be expensive at first sight, but once you install the plugin and some of the add-ons you will see that this plugin is really powerful and super easy to use. We’ve been using it since the early stages and can highly recommend it.
Create Contact Form
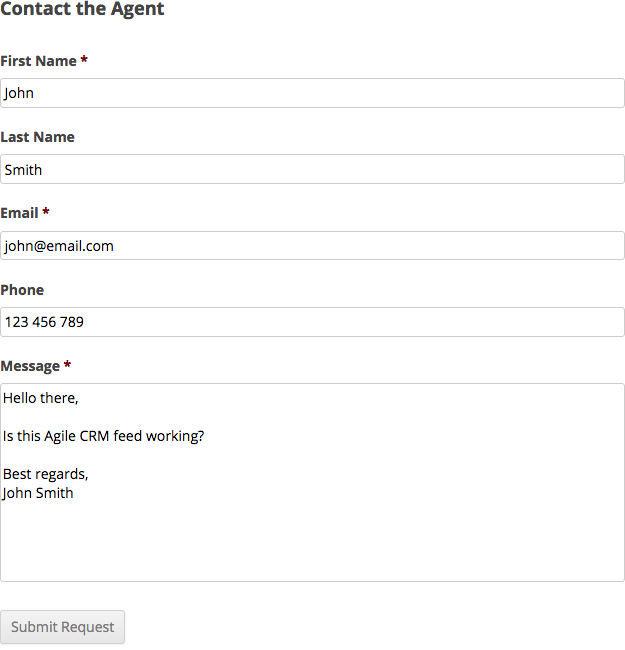
If you’ve installed Gravity Forms AND our WPCasa Gravity Forms add-on, you will find a ready-to-use form to be placed on single listing pages. Please also see our documentation for WPCasa Gravity Forms.
To access this form please go to WP-Admin > Forms > Contact the Agent > Edit. In the form editor you will see one field for Name. To better match the CRM data structure we will separate this in First Name and Last Name by adding one more Single Line Text field.
Install Agile CRM Add-On
Now that our contact form is in place we are ready to install the Gravity Forms Agile CRM add-on that you can download from your account on the Gravity Forms website. Please also see the Gravity Forms Agile CRM documentation.
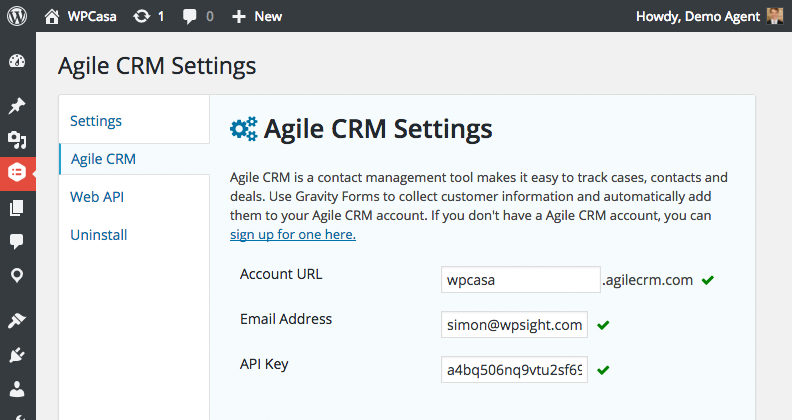
After activating the add-on we will have to enter your Agile CRM API (please see documentation linked above) on WP-Admin > Forms > Settings > Agile CRM. When the settings are saved and the details are correct you will see the green check marks telling you that your Agile CRM account is now connected.
Create Agile CRM Feed
At this point we are ready to tell our contact form to send data to the CRM every time the form is sent. Please go back to the form editor on WP-Admin > Forms > Contact the Agent > Settings > Agile CRM.
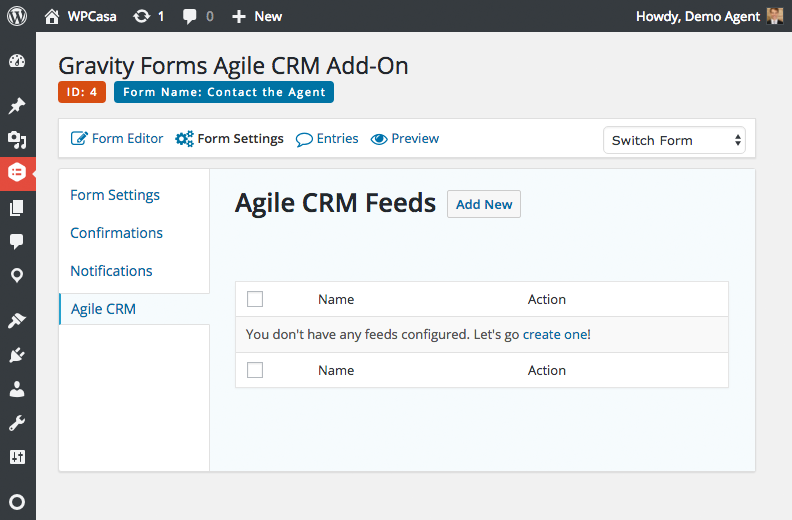
The actions that are triggered each time a form is sent are defined in an Agile CRM Feed. By default there is none, so let’s create one by clicking the Add New button. Please also see the Gravity Forms Agile CRM documentation.
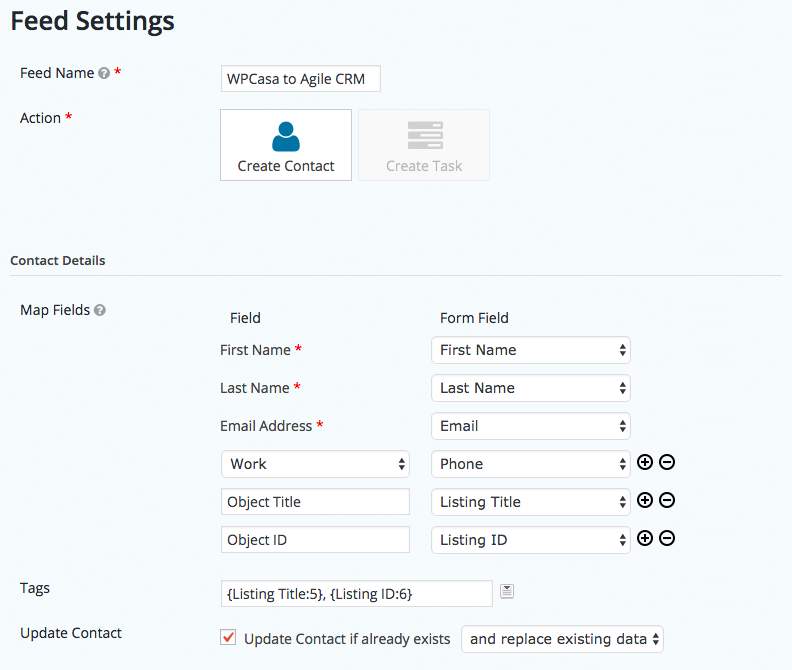
First we enter a name as a unique identifier of the feed. For our tutorial I will call it WPCasa to Agile CRM.
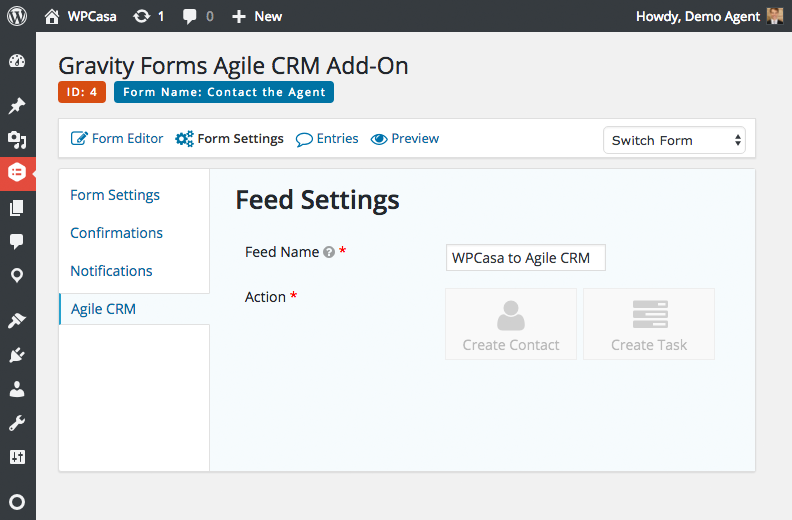
In the next step we need to decide what kind of action should be performed when the feed is triggered. The first and most obvious option is creating a contact with the details sent through the contact form.
Create Contact Action
Once selected the Create Contact action a new set of options will appear that allows us to match the form fields with the fields available in Agile CRM.
Map Fields
In our example we matched the following fields:
| CRM Field | Form Field |
|---|---|
| First Name | First Name |
| Last Name | Last Name |
| Email Address | |
| Phone Number/Work | Phone |
| Custom Field/Object Title | Listing Title |
| Custom Field/Object ID | Listing ID |
The last two fields Object Title and Object ID are Agile CRM custom fields that can be set up by yourself. There is a pre-defined set of fields from the CRM but you can also add any information you might find necessary when creating the contact lead.
Tags
Further we want to add some tags to this lead that help us to stay organized in the CRM system. Contacts and tasks are searchable by using tags. In our example I added the listing tile and listing ID. You might find the details that make sense in your special case.
Update Contact
And finally we activate the option to update a contact in case it already exists. You can further decide to replace existing data or append the new data (e.g. phone number) to the contact.
Create Task Action
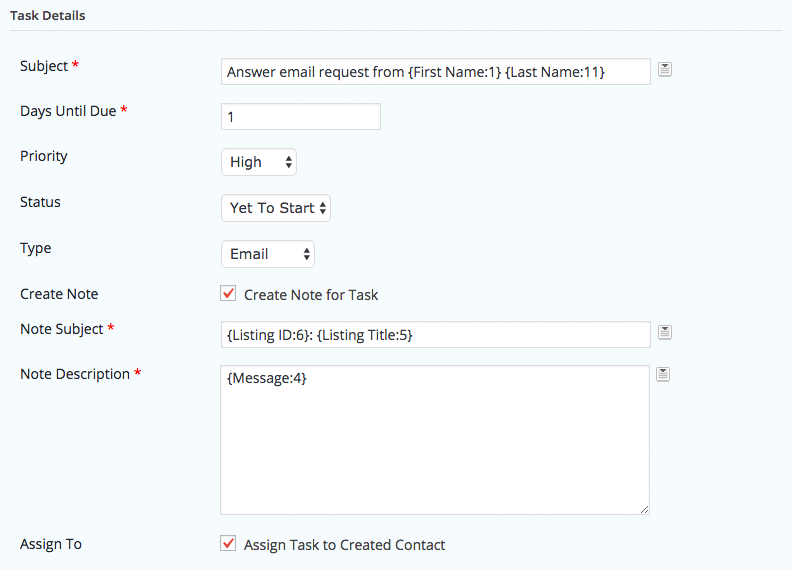
Another action that can be performed by a feed is creating a task in Agile CRM. When you click the Create Task button another set of options will appear.
Subject
Here we can create the task subject and also use Gravity Forms field shortcodes that will be replaced with the data sent through the contact form.
Days Until Due
Set the maximum number of days until the task should be completed.
Priority
There are three different options for priority: high, normal and low.
Type
You can also set the type of task choosing between Call, Email, Follow Up, Meeting, Milestone, Send, Tweet and Other.
Create Note
Optionally you can attach a note to the task. In this example I added the listin ID and title as note subject and the email message as description.
Assign To
Lastly we can assign this task to the contact that has just been created or updated by the feed.
Send Test Email
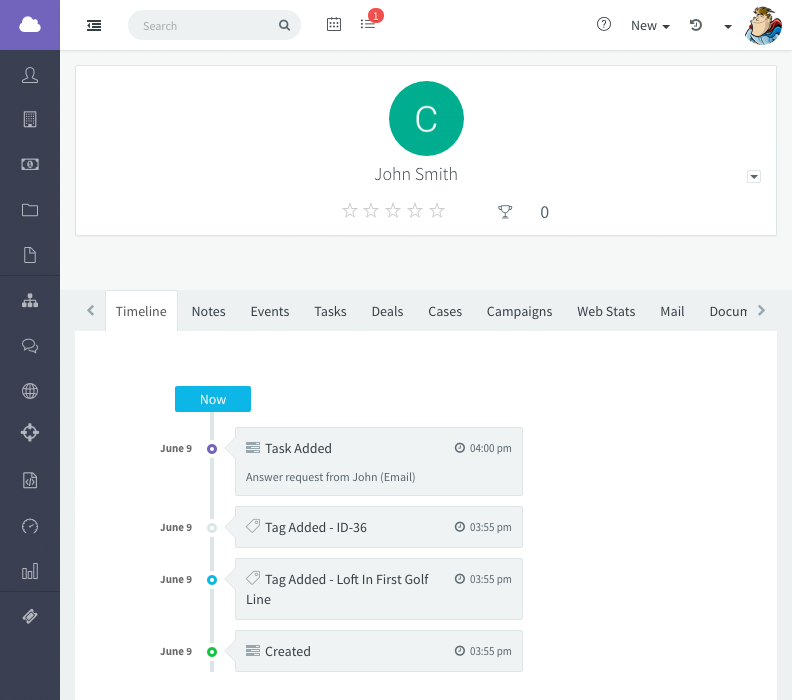
Right now we are ready to send our first lead to Agile CRM by sending a test email and checking if our feed has been triggered correctly.
Check Agile CRM
When you now log into your Agile CRM account and check your contacts, you should see the name that you’ve just entered in the test email. I entered John Smith and John is now among the Michael Jordans and Homer Simpsons.
From now on I recommend to start exploring the different possibilities that the Agile CRM solution has to offer in case you do not know the system already.
Final Thoughts
Managing your contacts in a separate CRM and getting used to it in your daily work-flow is a bit of work. But the positive marketing effects could really benefit your business and take it to the next level.
As I mentioned above this setup is not entirely free and you will have to put some money. But you could first take Agile CRM for a test drive to see if it suits your needs. If yes, you can take this tutorial and take your business a step further with a professional real estate CRM setup.
Useful Links
- Agile CRM
- Agile CRM Real Estate
- Gravity Forms
- Gravity Forms Agile CRM add-on & documentation
- WPCasa Gravity Forms add-on