Newsletters are a strong marketing channel that you could use for your real estate agency. Let your website visitors subscribe to your newsletter to stay in the loop with your business news. Maybe they are potential buyers or are planning to sell a unique home.

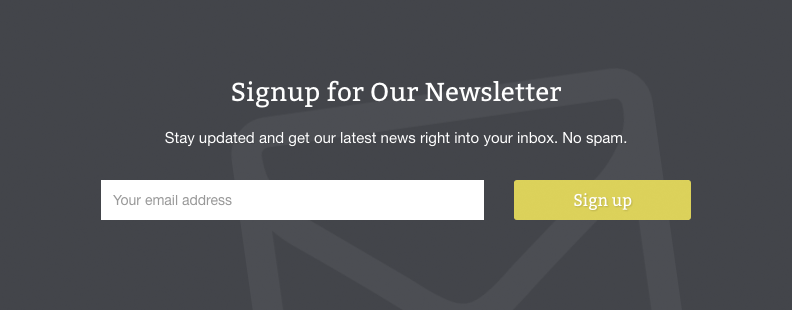
In the WPCasa Oslo demo we put some emphasis on newsletters because we think that they could be really effective. The theme comes with a widget that let’s you easily display an eye-catching newsletter subscription form. In this tutorial we explain how you can do it too.
Mailchimp for Example
At WPCasa we use Mailchimp to manage newsletters. They offer great service and sending newsletters is free when you don’t reach certain limits. Have a look at their website for more information. We will focus on Mailchimp in this tutorial but of course you can use any other newsletter provider or work with a WordPress plugin that offers this option.
To connect our site with the Mailchimp account we use the plugin MailChimp for WordPress which is absolutely easy to handle and free in the basic version (enough for our purpose).
Create Subscription Form
Once you installed this plugin and set up the connection to your Mailchimp account you are ready to set up a subscription form to be displayed on your website. Please visit WP-Admin > Mailchimp for WP > Forms.

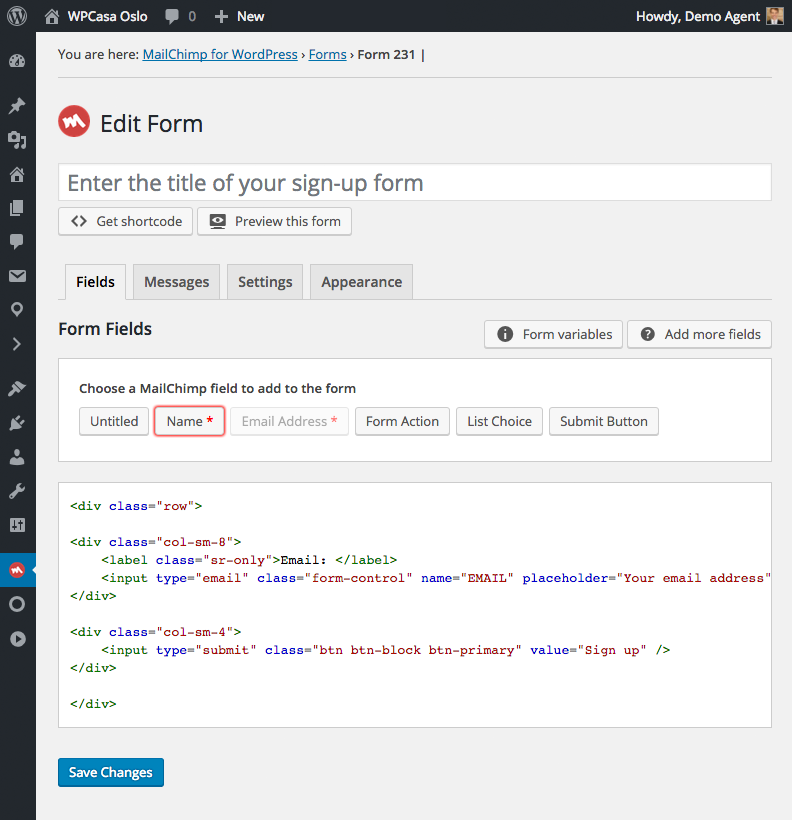
To display a form as seen in the WPCasa Oslo demo we create a simple form with an email field and a submit button. The code we used in the demo is the following:
<div class="row">

  <div class="col-sm-8">
	<label class="sr-only">Email: </label>
	<input type="email" class="form-control" name="EMAIL" placeholder="Your email address" required />
  </div>

  <div class="col-sm-4">
  	<input type="submit" class="btn btn-block btn-primary" value="Sign up" />
  </div>

</div>
WPCasa Oslo is based on Twitter’s Bootstrap and to make sure that the email behaves nicely on smaller screens and mobiles we added some grid classes.
Activate Newsletter Widget
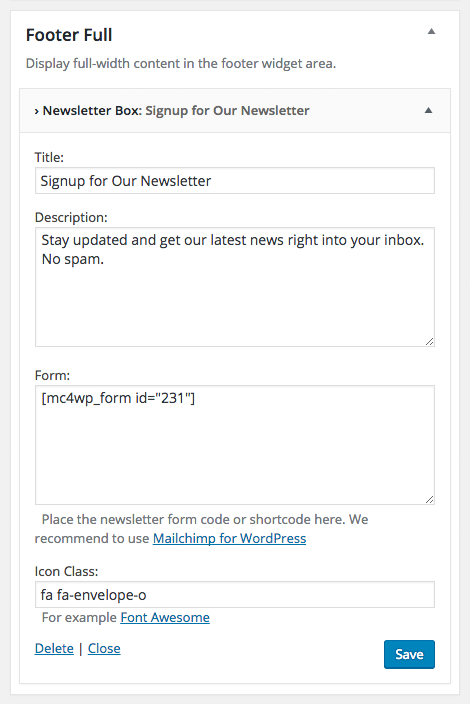
As mentioned before WPCasa Oslo comes with a newsletter widget that helps you to display a professional form in any widget area available in the theme. Please go to WP-Admin > Appearance > Widgets and find the Newsletter Box widget. To activate it drag and drop it in any of the theme’s widget areas. In the demo we activated the widget in the Footer Full widget area.

The Newsletter Box widget will display your form similar to a call to action but of course including the subscription form. You can set a main title, a description with some additional information, an area to add your form (we use the shortcode that comes with the above-mentioned plugin here) and you can set an icon that is displayed in the background of the widget.
Final Thoughts
Take this as an example and create your own forms with as many fields as you need or with the newsletter provider your prefer.
Other articles in WPCasa Oslo
- Adding a Logo in WPCasa Oslo
- Adding a Newsletter Form to WPCasa Oslo
- Changing the WPCasa Oslo Color Scheme
- Displaying Social Icons in WPCasa Oslo
- Importing Demo Content into WPCasa Oslo
- Installing WPCasa Oslo
- Setting up the WPCasa Oslo Home Page
- Setting up the WPCasa Oslo Single Listing Page
- Using the WPCasa Oslo Header Settings
- Using the WPCasa Oslo Widget Areas