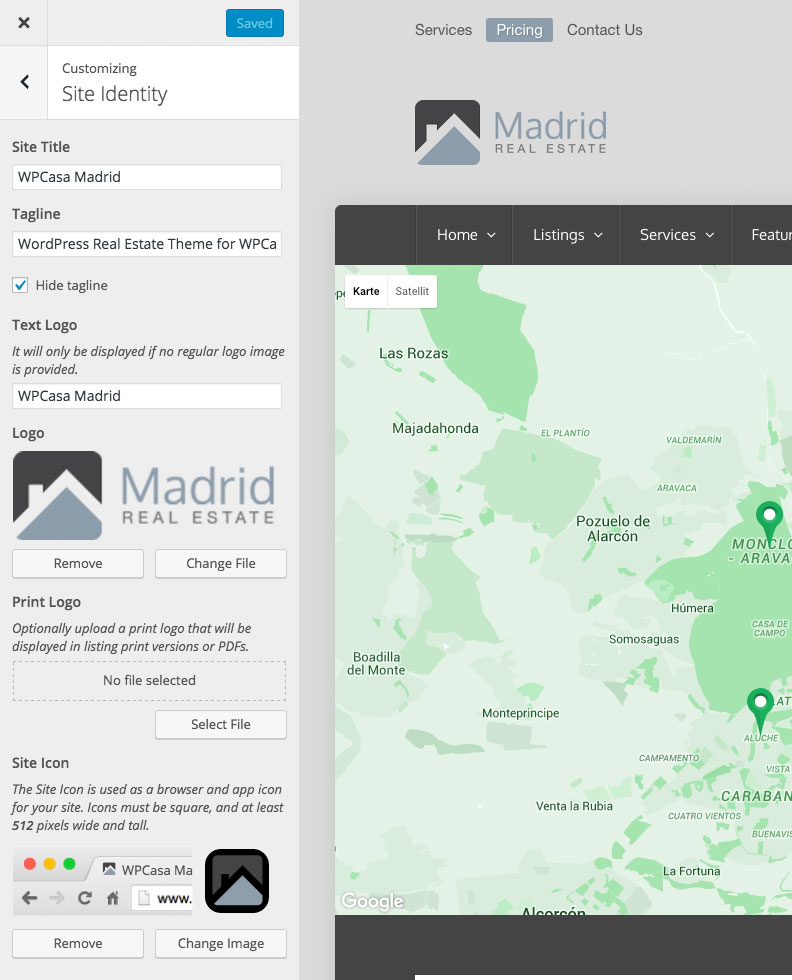
While setting up WPCasa Madrid you will want to add your own logo to the site header. There are a few different options that we will explain in this tutorial.
You can change the logo to your needs through the WordPress theme customizer on WP-Admin > Appearance > Customize. You will find the corresponding settings in the Site Identity section of the customizer. Please find list of available options below.

Site Title
The default option is the main title of your site that can be set on WP-Admin > Settings > General or directly in the theme customizer. When you decide to display a text logo but do not specify it below, this options will be used.
Tagline
Further you can decide to display or hide the tagline of your site under the logo.
Text Logo
If you want to use text as the main logo but you want it to be different from the main site title, you can enter an alternative text logo that will be displayed instead of the site name.
Logo Image
But of course you can also upload your logo image. By default Madrid comes with a logo image. Here you can upload your own. Once you provide an image in the customizer it will be displayed instead of the text logo options mentioned above.
Print Logo
Finally you can provide a logo image that is displayed on the listing print page or listing PDF (if you use the Listing PDF add-on).
Site Icon
The last setting is the option to upload a site icon (also favicon).
Other articles in WPCasa Madrid
- Adding a Logo in WPCasa Madrid
- Adding a Newsletter Form to WPCasa Madrid
- Changing the WPCasa Madrid Color Scheme
- Displaying Social Icons in WPCasa Madrid
- Importing Demo Content into WPCasa Madrid
- Installing WPCasa Madrid
- Setting up the WPCasa Madrid Home Page
- Setting up the WPCasa Madrid Single Listing Page
- Using the WPCasa Madrid Header Settings
- Using the WPCasa Madrid Widget Areas